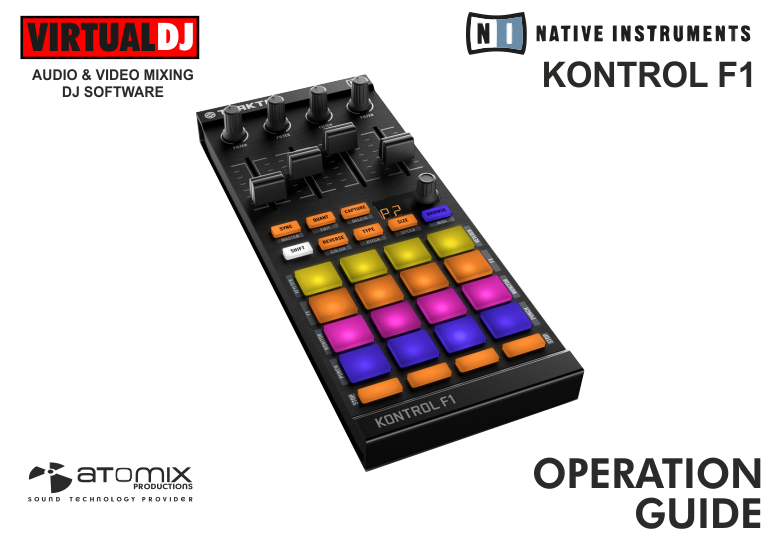
NATIVE INSTRUMENTS KONTROL F1
INSTALLATION
Firmware: Firmware: Update the firmware of the unit to the latest version from Native Instruments
Drivers: Install the latest drivers from Native Instruments
VirtualDJ 8 Setup
(in case you have not done already)
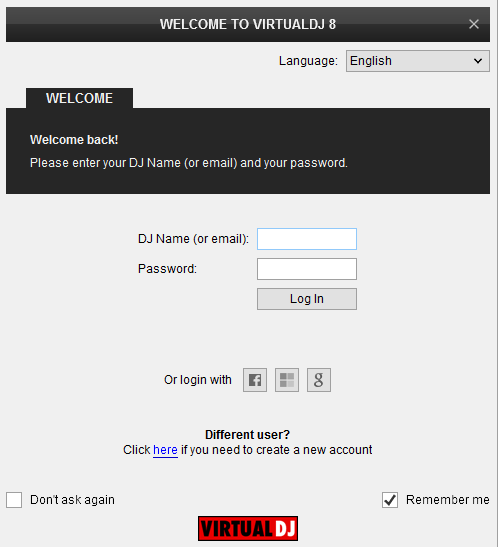
Once VirtualDJ 8 is launched, a Login Window will appear. Login with your virtualdj.com account credentials. A Pro Infinity, a Kontrol F1 Plus or a Pro Subscription License is required to fully use the Kontrol F1
Without any of the above Licenses, the controller will operate for 10 minutes each time you restart VirtualDJ.
Buy a license
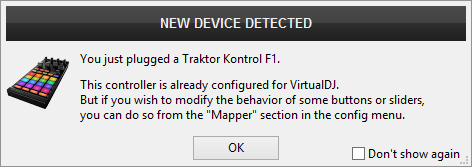
Click to OK.
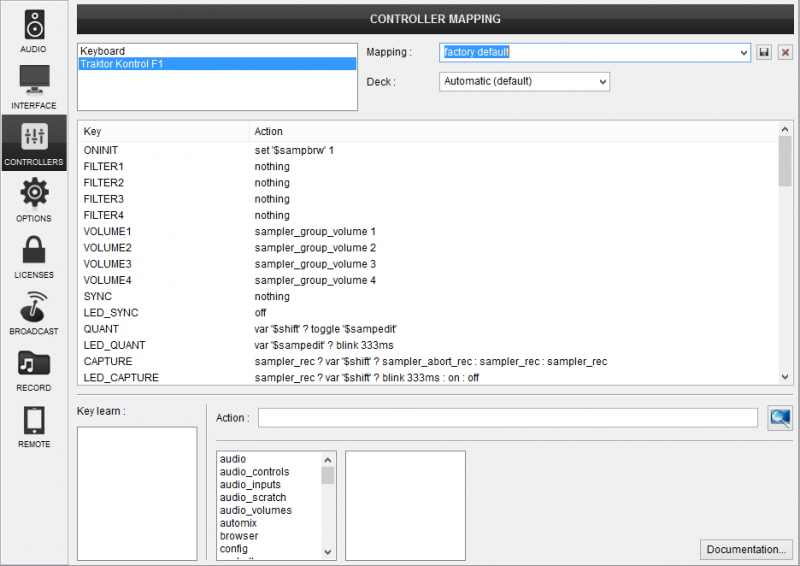
Advanced Setup
The unit should be visible in the CONTROLLERS tab of Config and the “factory default” available/selected from the Mappings drop-down list. The factory default Mapping offers the functions described in this Manual, however those can be adjusted to your needs via VDJ Script actions.
Find more details at
VDJ Pedia
For further software settings please refer to the Manuals of VirtualDJ 8.
CONTROLS
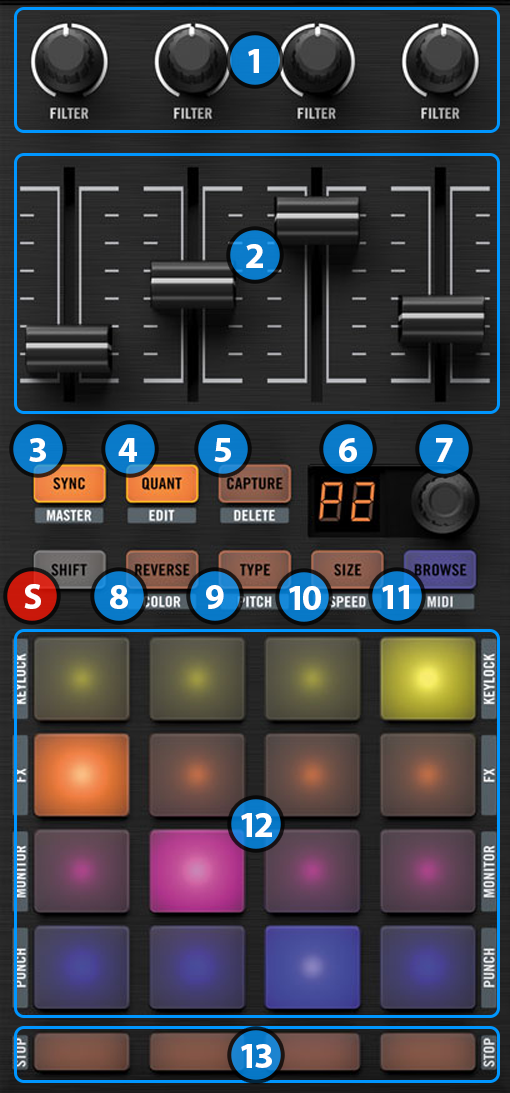
- S SHIFT : Hold this button down to access secondary functions of Kontrol F1
- FILTERS: These knobs are not mapped within VirtualDj and they can be used to assign any operation users may need via VDJ Script actions. Please find more details at VDJ Pedia
- VOLUMES: Use these sliders to adjust the volume of the first 4 Groups in each Sampler Bank
- SYNC: It does not operate any pre-programmed function.
- QUANT : Hold down SHIFT button and press this button once. The pads on the controller will start blinking. Press a pad button to open the loaded sample of the pad on the Sampler Editor.
- CAPTURE: Press the button one time to start recording a new sample. Press a second time to stop and save the recording of the sample. If you wish to cancel the recording, hold SHIFT button first and then press this button again.
- DISPLAY: It shows the selected sample bank number, or the selected sample slot while SHIFT button is pressed.
- PARAMETERS: This knob offers different functions depending on the status of SIZE (10) and BROWSE (11) buttons. If SIZE (10) button is selected it controls the loop size of the selected sample. You can hold down SHIFT and rotate the knob to change the selected slot if you need to control another slot. If BROWSE (11) button is selected then it changes the current sample bank. You can hold down SHIFT and turn the knob to change the selected sample slot if needed as well.
- REVERSE: It does not operate any pre-programmed function.
- TYPE: Press this button to cycle between the different fire modes of the sampler: On/Off, Hold, Stutter & Unmute. Hold down the button and press a pad if you wish to change the fire mode of the selected sample only.
- SIZE: Press this button to change the mode of the PARAMETERS knob (7) so that it controls the loop size of the samples.
- BROWSE: Press this button to change the mode of the PARAMETERS knob (7) so that it controls the selected sampler bank.
- SAMPLER PADS: Press these buttons to fire the samples loaded on the corresponding slots of the sampler. Hold down SHIFT and press a pad to stop the specific sample from playing.
- STOP: Press these buttons to stop the samples playing on the same column.
